Many quality keyframes have Dome Screws to adjust how the frame rests on the keybed. Most dome screws are adjusted using a tuning hammer or special key.
Many Piano People do this on the work bench, using a straight-edge; some draw slips of paper between the dome screw surface and the keybed. Neither of these methods are reliable – or easy.
This is the best method:
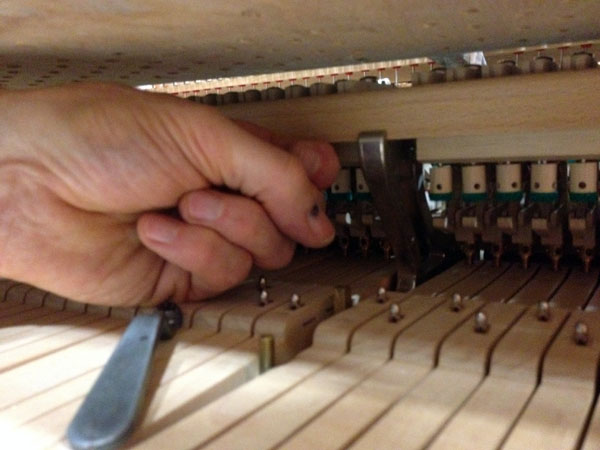
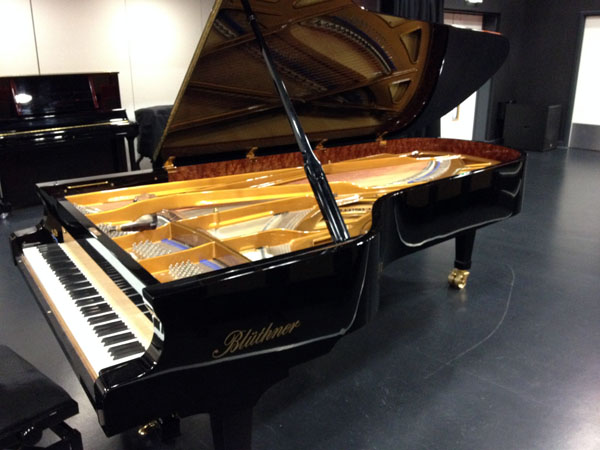
With the keyframe (and full action) in place on the keybed and cheek blocks screwed in position, tap obliquely down onto the key chasings close to each dome screw, lifting the keyframe as you tap (by pulling on the dome screw head or pressing up on the stack – as in the picture of a Bluthner concert grand) until you hear knocking (of the dome screw on the keybed).

Tapping the Chasings
The aim is to adjust each dome screw so that minimum lifting is required to produce knocking, thus putting as little tension into the keyframe as possible. Adjusting each dome screw may affect its neighbouring screw, so check up and down the keyframe several times.
For initial crude adjustment, try pressing down on the head of each dome screw. If this produces no visible movement of the hammers, the dome screw must be in firm contact with the keybed – and thus is either correctly adjusted or screwed down too far. Confirm this by tapping the chasing + gently lifting the stack. (if it’s screwed down much too far, it will be difficult/impossible to lift the keyframe clear, so you’ll get no knocking.)
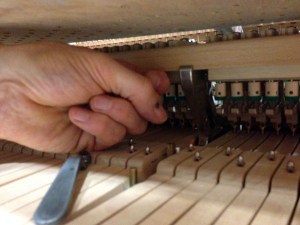
Gap check: lifting the stack
Whereas, if pressing down reveals downward movement of the row of heads, there’s obviously a gap between dome screw and keybed: the screw must be turned down. Keep turning it down until the stack lift+chasing tap produce knocking. Now check neighbouring dome screws. Etc….
Sounds labourious? Once mastered, this method is quick and failsafe.